When tackling home improvement projects, many DIY enthusiasts and homeowners find themselves wondering about using emulsion paint on wooden surfaces.
The question “Can you paint wood with emulsion?” is more complex than it might initially appear.
In this comprehensive guide, we’ll explore the intricacies of using emulsion paint on wood, from understanding the basics to mastering advanced techniques.
Emulsion paint, traditionally designed for walls and ceilings, has gained popularity as a potential solution for wooden surfaces due to its affordability, vast color range, and ease of use.
However, successful application requires careful consideration of multiple factors, proper preparation, and an understanding of both the paint’s capabilities and limitations.
Can You Paint Wood With Emulsion?
This guide will walk you through everything you need to know about using emulsion paint on wood, helping you make informed decisions about your painting projects and achieve professional-looking results that stand the test of time.
Understanding Emulsion Paint: Composition and Properties
Before diving into application techniques, it’s crucial to understand what emulsion paint is and how it interacts with wooden surfaces.
Basic Composition:
- Water-based formula with suspended plastic resin particles
- Pigments for color
- Binding agents for adhesion
- Additives for specific properties (flow, durability, etc.)
Key Properties of Emulsion Paint:
- Physical Characteristics
- Quick-drying nature
- Variable viscosity levels
- Different sheen options
- Color stability
- UV resistance (varies by brand)
- Chemical Properties
- Water-soluble when wet
- Forms polymer film when dry
- Low VOC content
- pH balanced formulation
- Temperature sensitive
Types of Emulsion Finishes Available:
| Finish Type | Sheen Level | Durability | Best Applications |
| Matt | 0-5% | Moderate | Decorative panels, feature walls |
| Eggshell | 10-25% | Good | General furniture, shelving |
| Satin | 25-35% | Very Good | Display pieces, trim work |
| Silk | 35-50% | Excellent | Accent furniture, architectural details |
| Gloss | 75%+ | Superior | Modern furniture, statement pieces |
Advantages of Using Emulsion Paint on Wood
Understanding the benefits of using emulsion paint can help determine if it’s the right choice for your project.
Cost Benefits:
- Economic Advantages
- Lower purchase price than specialized wood paints
- Larger quantities available at better prices
- Reduced need for specialized tools
- Cost-effective color matching options
- Affordable touch-up solutions
- Practical Benefits
- Quick drying time reduces project duration
- Easy application with standard tools
- Simple cleanup with water
- Low odor during application
- Minimal environmental impact
Aesthetic Advantages:
- Color Options
- Extensive color range
- Custom tinting available
- Consistent color matching
- Special effect finishes
- Color stability
- Finish Versatility
- Multiple sheen levels
- Contemporary look
- Easy to touch up
- Uniform appearance
- Blendable finishes
Limitations and Considerations
While emulsion paint offers many advantages, it’s important to understand its limitations:
Durability Concerns:
- Physical Limitations
- Less scratch-resistant than specialized wood paints
- Potentially lower impact resistance
- May chip more easily
- Limited water resistance
- Temperature sensitivity
- Environmental Limitations
- Not suitable for exterior use
- Poor performance in high-humidity areas
- Limited UV resistance
- Temperature fluctuation sensitivity
- Moisture absorption issues
Application Challenges:
- Surface Preparation Requirements
- Thorough cleaning needed
- Careful sanding required
- Proper priming essential
- Repair work must be complete
- Temperature conditions critical
- Technical Limitations
- Multiple coats are often necessary
- Longer overall drying time
- Special primers required
- Limited grain hiding ability
- Technique-sensitive application
Suitable Applications for Emulsion Paint
Understanding where emulsion paint works best on wood is crucial for project success:
Ideal Applications:
- Interior Decorative Elements
- Wall paneling
- Crown molding
- Baseboards
- Window trim
- Door frames (low traffic)
- Ceiling beams
- Architectural details
- Picture frames
- Decorative shelving
- Wood wall accents
- Furniture Pieces
- Bedroom furniture
- Display cabinets
- Bookcases
- Side tables
- Dining chairs
- Console tables
- Decorative boxes
- Plant stands
- Room dividers
- Non-functional pieces
Unsuitable Applications:
| Surface Type | Reasons to Avoid | Alternative Recommendations |
| Exterior Wood | No weather resistance | Use exterior wood paint |
| Kitchen Cabinets | Poor moisture resistance | Use cabinet paint |
| Wooden Floors | Insufficient durability | Use floor paint |
| Bathroom Woodwork | Can’t handle humidity | Use moisture-resistant paint |
| Window Frames | Weather exposure | Use weather-resistant paint |
| High-Traffic Doors | Limited wear resistance | Use door paint |
Essential Preparation Steps
Proper preparation is crucial for successful emulsion paint application on wood:
Surface Assessment:
- Initial Inspection
- Check for damage
- Identify loose parts
- Note areas needing repair
- Document existing finishes
- Test surface stability
- Cleaning Process
- Remove surface dirt
- Degrease thoroughly
- Clean in grain direction
- Allow complete drying
- Check for residue
Surface Preparation:
- Sanding Requirements
- Start with coarse grit (80-100)
- Progress to medium grit (120-150)
- Finish with fine grit (180-220)
- Sand in grain direction
- Remove all dust thoroughly
- Check surface smoothness
- Address rough spots
- Even out transitions
- Smooth edges
- Final inspection
- Repair Work
- Fill holes and cracks
- Replace damaged sections
- Sand repairs level
- Check repair stability
- Allow full curing time
- Match surrounding texture
- Address loose joints
- Secure loose elements
- Reinforce weak areas
- Final assessment
The Priming Process
Proper priming is essential for successful emulsion paint adhesion:
Primer Selection:
- Types of Primers
- Wood-specific primers
- Multi-surface primers
- Stain-blocking primers
- High-adhesion primers
- Moisture-resistant primers
- Tannin-blocking primers
- Two-in-one primers
- Quick-drying primers
- Specialty wood primers
- Universal primers
Application Guidelines:
- First Coat
- Clean surface thoroughly
- Apply a thin, even coat
- Use proper brush technique
- Maintain wet edge
- Check coverage
- Allow full drying
- Inspect results
- Note problem areas
- Address drips immediately
- Document drying time
- Between Coats
- Light sanding if needed
- Remove dust completely
- Check first coat integrity
- Address any issues
- Ensure surface cleanliness
- Check temperature conditions
- Verify humidity levels
- Plan second coat timing
- Prepare tools
- Review technique
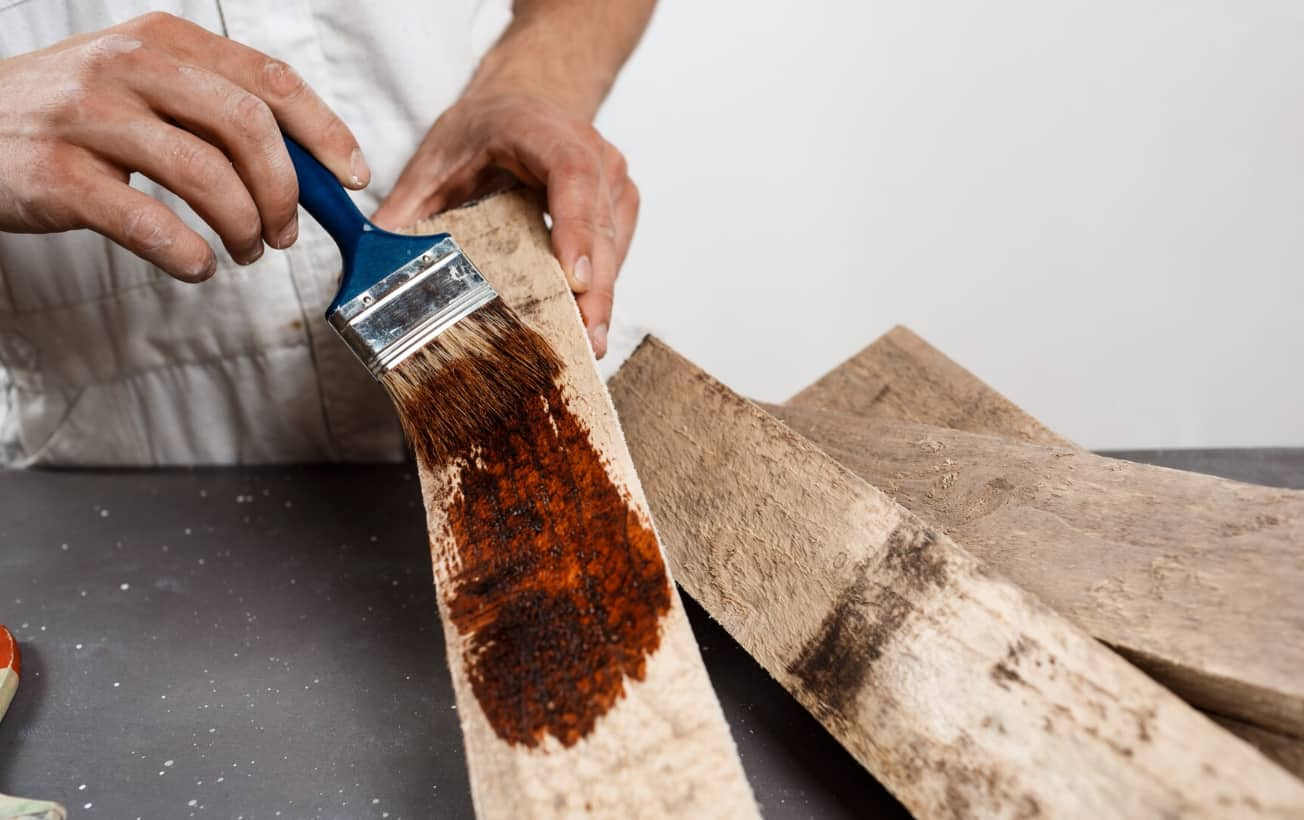
Paint Application Techniques
Proper application technique ensures professional results:
Required Tools:
- Essential Tools
- Quality synthetic brushes
- Foam rollers (various sizes)
- Paint trays
- Stirring sticks
- Protective sheets
- Painter’s tape
- Sandpaper assortment
- Clean rags
- Drop cloths
- Measuring tools
- Optional Equipment
- Paint sprayer
- Detail brushes
- Extension poles
- Paint strainers
- Tack cloths
- Moisture meter
- Temperature gauge
- Humidity monitor
- Work lights
- Ventilation fans
Application Process:
- First Coat
- Stir paint thoroughly
- Strain if necessary
- Test consistency
- Apply thin coat
- Work systematically
- Maintain wet edge
- Check coverage
- Monitor conditions
- Address problems
- Document process
- Between Coats
- Allow proper drying
- Check surface
- Light sanding
- Remove dust
- Clean surface
- Prepare tools
- Check conditions
- Plan timing
- Review technique
- Address issues
- Final Coat
- Apply carefully
- Ensure consistency
- Check coverage
- Monitor finish
- Address imperfections
- Allow full curing
- Protect surface
- Document completion
- Plan maintenance
- Final inspection
Protection and Maintenance
Proper care ensures long-lasting results:
Immediate Protection:
- During Curing
- Avoid touching
- Prevent dust
- Control temperature
- Monitor humidity
- Protect from damage
- Allow air circulation
- Keep area clean
- Check periodically
- Document conditions
- Plan full cure time
- Initial Care
- Gentle cleaning only
- Avoid harsh chemicals
- Use soft cloths
- Check for issues
- Address problems
- Maintain environment
- Monitor changes
- Document care
- Plan routine
- Set schedule
Long-term Maintenance:
| Time Period | Maintenance Tasks | Special Considerations |
| Weekly | Dust and clean | Use soft materials |
| Monthly | Inspect surface | Check for wear |
| Quarterly | Deep clean | Use appropriate cleaners |
| Bi-annually | Check for damage | Address issues promptly |
| Annually | Evaluate condition | Plan touch-ups |
Troubleshooting Common Issues
Understanding and addressing common problems:
Surface Problems:
- Paint Adhesion Issues
- Identify cause
- Document extent
- Plan remedy
- Execute fix
- Monitor results
- Prevent recurrence
- Update technique
- Review process
- Document solution
- Share learning
- Finish Quality Problems
- Assess issue
- Determine cause
- Plan Correction
- Implement fix
- Check results
- Prevent future issues
- Update methods
- Document process
- Review outcome
- Share findings
Expert Tips and Tricks
Professional insights for better results:
Advanced Techniques:
- Application Methods
- Cross-hatching technique
- Feathering edges
- Layering thin coats
- Working in sections
- Managing wet edges
- Brush control
- Roller techniques
- Detail work
- Clean-up methods
- Time management
- Environmental Control
- Temperature management
- Humidity control
- Ventilation
- Lighting
- Dust prevention
- Climate considerations
- Weather Monitoring
- Season planning
- Space Preparation
- Safety measures
Frequently Asked Questions
- Q: How many coats of emulsion paint are needed for wood?
A: Typically 2-3 coats after priming, depending on color and coverage. Dark colors may require additional coats.
- Q: Can I paint directly over varnished wood?
A: No, varnished wood requires sanding and priming first for proper paint adhesion.
- Q: What’s the ideal temperature for painting wood with emulsion?
A: Between 50-80°F (10-27°C) with moderate humidity for optimal results.
- Q: How long should I wait between coats?
A: Minimum 4 hours, preferably 6-8 hours in normal conditions. Longer in high humidity.
- Q: Do I need to seal emulsion paint on wood?
A: Yes, sealing with a clear protective topcoat is recommended for better durability.
Also Check:
- How to Create a Beautiful DIY Balloon Arch
- Transform Home with Artistic Decor MRR0536
- How to Paint Ikea Furniture
Conclusion:
Successfully painting wood with emulsion requires understanding both the capabilities and limitations of the paint.
While emulsion can be an effective and economical choice for certain wooden surfaces, success depends on:
- Proper surface selection and preparation
- Appropriate environmental conditions
- Correct application techniques
- Adequate protection and maintenance
- Understanding limitations
Remember that while emulsion paint offers many advantages for wooden surfaces, it’s not always the best choice. Consider the specific requirements of your project, including:
- Location and exposure
- Expected wear and tear
- Environmental conditions
- Desired finish
- Maintenance requirements
By following the guidelines in this comprehensive guide and carefully considering your specific needs, you can achieve professional-looking results that will last for years to come.